A Sequin Knit Cardigan using The Sewing Workshop Cascade Dress Pattern
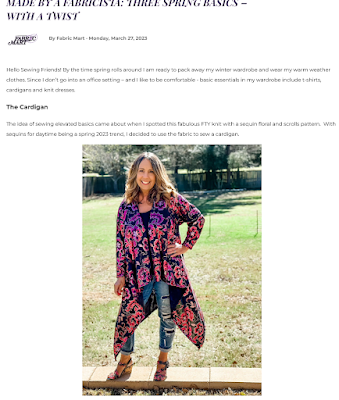
If you follow the Fabric Mart Fabricista blog, you've already seen my sequin cardigan in my April post. However, I want to document my makes here also as it provides reminders to myself regarding any changes I made. For my sequin cardigan, I used an out-of-print (OOP) Sewing Workshop pattern, the Cascade Dress. I don't recall the year the pattern was released. However, I do recall buying it at a sewing expo when it was a new release. One of the samples was sewn in a burnout velvet and it was gorgeous! Remember when Linda Lee used to be a vendor/teacher at the sewing expos? You could browse through and try on the Sewing Workshop sample garments. The patterns were $19.95 (I think) which was expensive for a pattern at that time. TSW typically had a show special where you could buy three patterns and get one free, or something like that. It was a long time ago and the show memories are a bit fuzzy. If you know leave me a comment! Anyway, I bought...